Django by errors - a different Django tutorial
Introduction
In this tutorial, we will focus on how to build a recipe site by taking one step at a time, seeing what error is waiting for us next.
When learning a new programming language or framework, there are so many guides and tutorials on how to do everything right. But what do you do the first time you get an error?
Here, we will be accustomed to as many error messages as possible while building a small app to store recipes.
In this tutorial, you will also learn how to use South for database migrations, and Twitter Bootstrap for a nice default site styling.
About Django
Django is a web application framework written in Python. As Python, it is Free software, licenced under the BSD license, and it has lots of documentation and a large community.
Django fosters rapid development, using an easy-to-learn and easy-to-read language like Python will let you not only make the computer understand what you mean, but also the people who may eventually inherit your scripts.
The components of Django are loosely coupled, so you can use another templating language instead of Django’s own, and you can even change the model layer to use Sqlalchemy instead of the built-in Django ORM (Object relational mapper: the layer that translates your models to database language).
In this tutorial, you will create a project, and then an application in that project. Django is built in a way that you will also be able to use third party applications inside your project, and you will in most cases start with a couple of Django applications. You can then build your apps in your projects in a way that you can mix them around and reuse them in other projects.
One of the most important parts is that you should not write the same code over and over again. So in Django projects you should not see long sections duplicated over and over. The “class based views” we are going to use is one good improvement to this, and the template inheritance system is another way you will not repeat yourself.
Simple steps
In this part, you will learn the most basic parts of Django, to get a feeling of how Django applications are built.
We assume you have a computer with Python installed, as all modern operating systems come with Python installed. To check if python is installed, open up a terminal, write “python” and press enter. If the command was not found, you should install Python.
We will also use “virtualenv”. It should not be too hard to install, just check out their official installation documentation.
Starting a project
Find a place where you want your project, and create a virtual environment to keep your requirements and dependencies separated from the rest of your python system:
$ virtualenv --no-site-packages env
And activate your new virtual environment:
$ source env/bin/activate
You are now “inside” this virtual environment. You can type “deactivate” to get out of it. Each time you open a terminal and want to work on a project in a virtual environment, you need to activate it using the command above. But be sure to be inside when installing Django:
$ pip install django
Now that Django is installed you have a new command inside the “bin” folder in env, which you can use to start a new Django project. I have named mine “recipes-project”:
$ ./env/bin/django-admin.py startproject recipes_project
Go into the project folder, make the manage.py script runnable and
start the built-in webserver:
$ cd recipes_project
$ python manage.py runserver
Now go to localhost:8000 in your web browser. You can stop the server by
pressing ctrl-c as suggested by the command output.
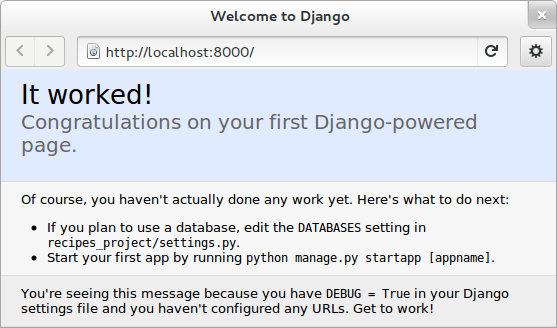
The page congratulates you, and tells you about your next steps: you should update your database settings and create an app. The apps are meant to be reusable components that you can tie together when building projects. We will do this after a little break.
File structure before creating an app
Inside the folder that was created with the start-project command, you will
see the manage.py file and a folder with the same as the project folder
itself.
Contents of project folder:
$ ls
manage.py  recipes_project
This subfolder is where project settings and common configuration is stored.
If you list the contents of the subfolder, you will see a special __init__
file that by being there makes the folder to be a Python package, a
settings file, the toplevel url routing file, and a wsgi file for
running the code by a server. You will need to notice the location of your
settings.py and the urls.py for later:
$ ls recipes_project
__init__.py   settings.py   urls.py   wsgi.py
__init__.pyc  settings.pyc  urls.pyc  wsgi.pyc
The pyc-files are compiled versions of the source files. We do not need to bother too much about them, and if you remove them, they will get recreated when the source files are run again.
Database setup
The welcoming page told us to setup the database. The database settings are
part of the settings.py file in the configuration folder. Open up
recipes_project/settings.py in your favourite text editor, and change the
database settings: Append sqlite3 to the ENGINE field and add a
database name to the NAME field, “database.db” is a good name:
DATABASES = {
    'default': {
        'ENGINE': 'django.db.backends.sqlite3',
        'NAME': 'database.db',
        'USER': '',
        'PASSWORD': '',
        'HOST': '',
        'PORT': '',
    }
}
The database name will be the name of a local file in your project folder. Sqlite is a single-file database system that is easy to use when developing, but not recommended in a production for large sites.
Creating an app
The welcoming page also wanted you to create an app. Do this using the
manage.py command in the project folder:
python manage.py startapp recipes
This will create a new folder structure for the new app besides “manage.py” and the inner “recipes_project”, like this:
$ ls
manage.py  recipes  recipes_project
And the new recipes folder contains this:
$ ls recipes
__init__.py  models.py  tests.py  views.py
Activating the app
Now, you should enable your new app in the settings.py, by adding the name
of your app to the INSTALLED_APPS, near the bottom of the file. The section
should look something like:
INSTALLED_APPS = (
    'django.contrib.auth',
    'django.contrib.contenttypes',
    'django.contrib.sessions',
    'django.contrib.sites',
    'django.contrib.messages',
    'django.contrib.staticfiles',
    # Uncomment the next line to enable the admin:
    # 'django.contrib.admin',
    # Uncomment the next line to enable admin documentation:
    # 'django.contrib.admindocs',
    'recipes',
)
The extra comma at the end is optional on the last line, but I recommend it, as it makes it easier to add another line later.
Now, to route traffic to the newly created app, we also need to add a line to
the list of url patterns Django will use to match incoming requests. In the
project level urls.py, you will see a line like this:
# url(r'^recipes_project/', include('recipes_project.foo.urls')),
The code with “#” in front is “commented out” and will not run. To make it active, remove the “#”. We will also change the line itself so it reads:
url(r'^recipes/', include('recipes.urls')),
Every address that starts with “recipes” will now point to a urls file of your recipes app, where the actual routes to views will happen.
It is useful to keep a terminal always running python manage.py runserver,
and use another terminal window or tab for all the other commands you need to
run. Remember to run the activate command in your new terminal.
Refresh the browser and see that complains: “No module named urls”

The line we just activated tells Django to look for url patterns in a file at “recipes/urls.py”, but that file does not exist yet. Copy the urls.py from the project folder into the app folder, and remove all the commented code and url patterns so that the new file looks like this:
from django.conf.urls import patterns, include, url

urlpatterns = patterns('',
        )
Go to the browser and refresh. Now it says “Page not found (404)” which is a generic error message about a page not being found, but this also tells you what alternatives you have.
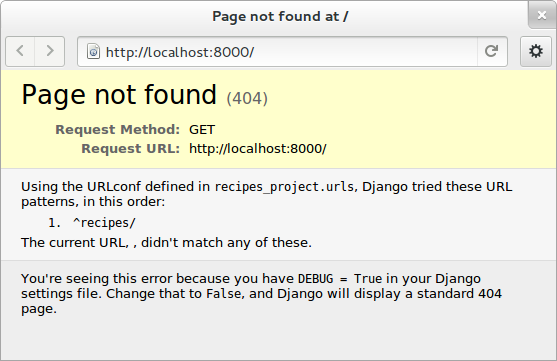
The page suggests that you should add /recipes/ to the address field of
your browser. In the urls.py you have created a rule that sends everything
starting with recipes/ to the recipes app. Go ahead, add recipes to the
browser location, and see that you get the first “It worked!” page again as
there were no errors, but also, no contents.
Models, views and templates
There are different ways to organize code so it will not end up as a pile of spaghetti. Have a look again in the recipes app folder, you’ll see four files ending in ‘.py’. The __init__ is needed for the Python module that the app is to work, models will contain your models, tests will contain your tests, and views is the code that will build up different “pages”:
$ ls recipes
__init__.py   models.py   tests.py  urls.pyc
__init__.pyc  models.pyc  urls.py   views.py
Later we will add templates as well: HTML code that will decide the layout and design of your pages. The templates folder is not created automatically as it is possible to put templates other places as well.
If you are coming from another language or framework, you will eventually see that the templates are stricter than you are used to. You are not allowed to put tons of functionality into the template code A graphical designer should be able to understand and change the templates without knowing Python or Django.
Your first model: Food
That’s enough theory for a while. Now we will add a very simple model to
models.py. This is the model for all the types of food we will use in the
recipes. It will only have one field we need to know of, the name of the food
objects. Django will automatically give it an id field for the primary key.
Add the following class to recipes/models.py:
class Food(models.Model):
    name = models.CharField(max_length=20)
This model has to be used by the database. Django has a manage command called
syncdb that will setup and all tables needed by Django for us. But wait a
minute. Using a third party tool called south we can get database migrations
as well.
Set up database migration support
Database migrations let you script the database changes so you can go from one
version to another without manually executing alter table or other SQL
commands. You can also use this for data migrations, but we will not get into
that now. You need a third party app called “South” to do this. There have been
discussions about taking all or parts of South into the core of Django
In settings.py, add 'south', to the bottom of the INSTALLED_APPS to use
that app as well as your own. When saving the file, the running “runserver”
process will stop, telling:
Error: No module named south
You need to install South:
$ pip install south
And restart your server.
To create your first migration belonging to the recipes app/module, use the init subcommand:
$ python manage.py schemamigration recipes --init
This will only create the migration, not do anything to the database, as you can create more migrations and execute them at the same time. It will also prevent the syncdb command from creating your databases without migration support.
To actually run this command, you need to run the management command
migrate. This will only take care of your new app (since this is the only
one with migrations defined). To do both syncdb and migrate at the same
time, run:
$ python manage.py syncdb --migrate
The first time syncdb is run, it will ask you to create a user. We will soon be using the built-in admin interface where you later can create users, but to log in and create users, you need a user, so please answer “yes” and fill in the information. The output will look similar to this:
Superuser created successfully.
Installing custom SQL ...
Installing indexes ...
Installed 0 object(s) from 0 fixture(s)
Migrating...
Running migrations for recipes:
 - Migrating forwards to 0001_initial.
 > recipes:0001_initial
 - Loading initial data for recipes.
Installed 0 object(s) from 0 fixture(s)

Synced:
 > django.contrib.auth
 > django.contrib.contenttypes
 > django.contrib.sessions
 > django.contrib.sites
 > django.contrib.messages
 > django.contrib.staticfiles
 > south

Migrated:
 - recipes
The output from the syncdb command states that all apps specified in INSTALLED_APPS, except for your recipes, has been set up using the normal syncdb, and that your recipes app has been set up using a migration. Good.
Set up admin interface
Now we will utilize the built-in Django Admin. In urls.py in the project
folder, uncomment the lines regarding admin:
from django.conf.urls import patterns, include, url

# Uncomment the next two lines to enable the admin:
from django.contrib import admin
admin.autodiscover()

urlpatterns = patterns('',
   # Examples:
   # url(r'^$', 'recipes_project.views.home', name='home'),
   url(r'^recipes/', include('recipes.urls')),

   # Uncomment the admin/doc line below to enable admin documentation:
   # url(r'^admin/doc/', include('django.contrib.admindocs.urls')),

   # Uncomment the next line to enable the admin:
   url(r'^admin/', include(admin.site.urls)),
)
We have already set up an url pattern to forward everything starting with recipes/ to the python module recipes.urls, and now everything starting with “admin” will redirect to the admin interface we will soon take a closer look at.
If you refresh your browser at this time, you will get an error about your site being improperly configured.
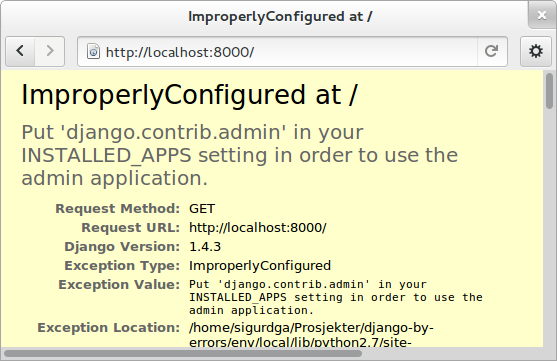
The error message suggests that you should put django.contrib.admin in the
INSTALLED_APPS section of settings.py. It is already there, you just need to
uncomment it.
After uncommenting the admin app, have a look in your browser. No matter what
address you go to, the server will not find it, and suggests you should try
localhost:8000/admin/. Go there and have a look.
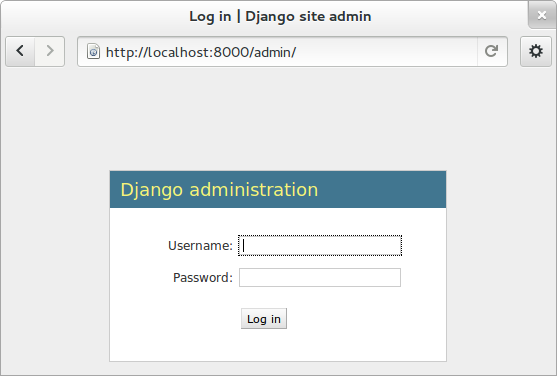
You should now be able to log in and have a look around. You should see some predefined classes from Django like User and Group, but Admin can also take care of your Food model. To get that to work, you need to create a file in the recipes folder called “admin.py”. The file should contain:
from django.contrib import admin
from recipes.models import Food

admin.site.register(Food)
On browser refresh, nothing changes. When adding new models to admin, you need to restart the server. Just stop it (ctrl-c) and restart the runserver command.
You should now be able to see your Food model in the list. Click on it and try to add some food objects, like “Banana” or “Apple”.
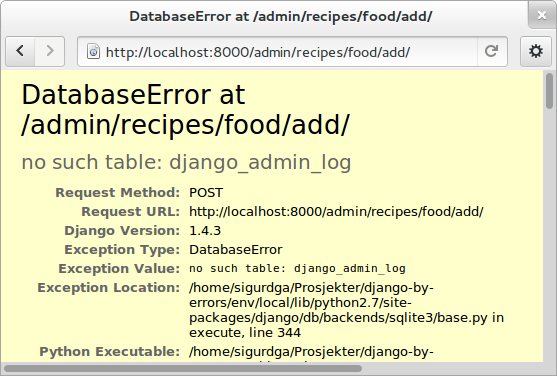
You will now get an error complaining about missing tables. This is because you added the admin inteface after the last run of “syncdb”, so the tables admin needs are not created. Just run the same syncdb command again:
$ python manage.py syncdb --migrate
This time, the output also lists “django.contrib.admin” as a synced app.
Adding a method to your model
When you have successfully created Apple and Banana, you will see that you have two lines of Food object.
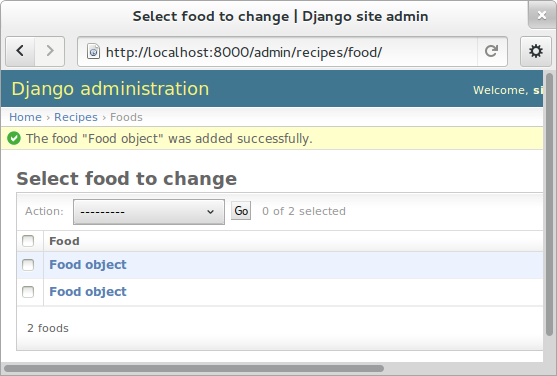
This is not very useful, as it is not possible to distinguish between the lines
in the list. In your models.py add a function named __unicode__ inside your
Food class (at the same indentation level as the “name”). Make it return
self.name, like this:
def __unicode__(self):
    return self.name
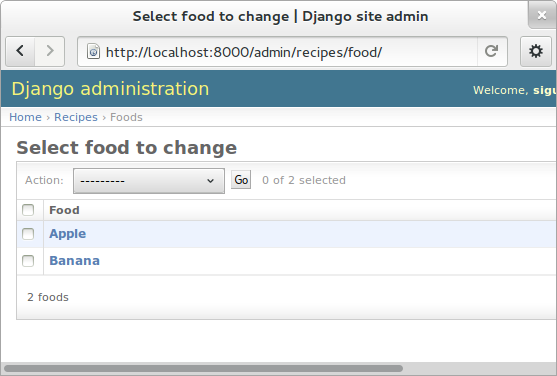
When refreshing the list, your table should look more user friendly. The
__unicode__ is utilized by Django to write a human readable version of the
object. A side effect is that you now have defined a default representation of
the object, so you do not need to add .name everywhere.
Your first view: Food list
Admin does everything nice and tidy, but you don’t want to expose the admin inteface to your users. We have to create a simpler representation to show to our users.
Open up recipes/views.py and paste in this code:
from django.shortcuts import render_to_response
from django.template import RequestContext
from recipes.models import Food

def food_list(request):
    food = Food.objects.all()
    return render_to_response('recipes/food_list.html', {'object_list': food}, context_instance=RequestContext(request))
The food_list method will fetch all Food objects from the database.
Hold them in a variable named food, and send this variable to a template
named food_list.html, but as a variable named object_list exposed to
the template.
Go to your app’s urls.py and add an import statement to the top:
from recipes.views import food_list
And a line to the pattern list to get all food:
url(r'^food/$', food_list, name='food-list'),
Now /recipes/food/ should trigger the newly created food_list function.
Go to this address and see what you get.
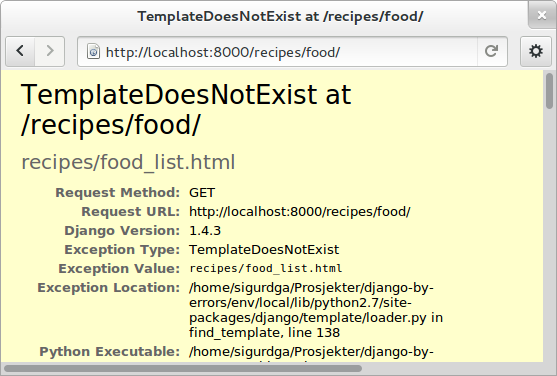
You got an error message. It tells you to make a template named “recipes/food_list.html”.
Bootstrapping a template
We will make this template in a folder named “templates/recipes” inside the app folder:
$ mkdir -p templates/recipes
And create a file in the newly created folder called food_list.html
containing (copied from
http://twitter.github.com/bootstrap/getting-started.html and changed to serve
static media from Django’s locations):
<!DOCTYPE html>
<html>
<head>
<title>Bootstrap 101 Template</title>
<!-- Bootstrap -->
<link href="{{ STATIC_URL }}css/bootstrap.min.css" rel="stylesheet">
</head>
<body>
<h1>Hello, world!</h1>
<script src="http://code.jquery.com/jquery-latest.js"></script>
<script src="{{ STATIC_URL }}js/bootstrap.min.js"></script>
</body>
</html>
This template needs some files from the Twitter Bootstrap project, so in your
app folder, download twitter bootstrap static files, unzip and rename the
directory to static:
$ wget http://twitter.github.com/bootstrap/assets/bootstrap.zip
$ unzip bootstrap.zip
$ rm bootstrap.zip
$ mv bootstrap static
Have a look at the file structure there and compare to the explanations at http://twitter.github.com/bootstrap/getting-started.html. It should be alright.
You need to stop and start the server again, as the new templates folder is only picked up at server restart.
Now, refresh the web browser and see the page saying “Hello, world!”.
The real coding begins
We will now change the template. You can compare your work to the full example further down the page.
Add a div tag with class container around the h1 and see how the page
changes. Change the template by changing the h1 tag and the title, and
after the h1 (but inside the div), display the contents of the
object_list template variable we created above, like this:
<ul>
{% for object in object_list %}
<li>{{ object }}</li>
{% endfor %}
</ul>
Refresh your browser and see. We want to see some details about the food we
have created, but we do not know the addresses to these pages yet, so we will
insert empty links (a href=””) around the {{ object }}. Insert this instead of
{{ object }}, (inside the li-tag):
<a href="">{{ object }}</a>
Also add an empty link at the bottom of the page that will later be used for adding more food to our list.
<a href="">Add food</a>
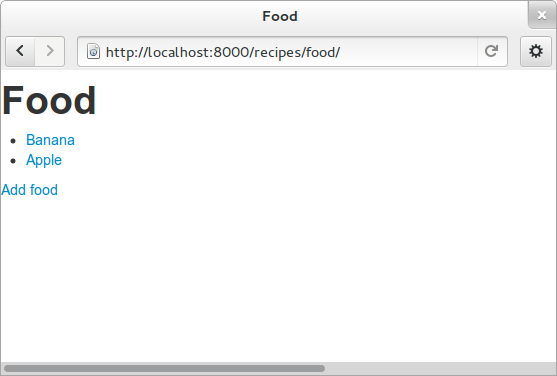
The template should now look similar to this:
<!DOCTYPE html>
<html>
<head>
<title>Food</title>
<!-- Bootstrap -->
<link href="{{ STATIC_URL }}css/bootstrap.min.css" rel="stylesheet">
</head>
<body>
<div class="container">
    <h1>Food</h1>

    <ul>
    {% for object in object_list %}
    <li><a href="">{{ object }}</a></li>
    {% endfor %}
    </ul>

    <a href="">Add food</a>
</div>

<script src="http://code.jquery.com/jquery-latest.js"></script>
<script src="{{ STATIC_URL }}js/bootstrap.min.js"></script>
</body>
</html>
A simpler view
The view function we made earlier gives us full control over what happens. But it is long, and making a few of these requires a lot of typing. To make sure you don’t repeat yourself too much, you can use the newer “Class based generic view”s instead.
In views.py, remove the file contents and insert this instead:
from recipes.models import Food
from django.views.generic import ListView

class FoodListView(ListView):
    model = Food
And the urls.py should import the new FoodListView instead of food_list,
like this:
from recipes.views import FoodListView
And the pattern should be changed to this:
url(r'^food/$', FoodListView.as_view(), name='food-list'),
Here, instead of calling the view function directly, we are now calling the
as_view function on the FoodListView class we just created. Our
FoodListView does not define this as_view() function, but inherits it
from the ListView model class of the django.views.generic module.
Have a look in the browser. The functionality is the same, the code a bit shorter. You may need the old syntax from time to time, so you should know that an old and more flexible syntax exists.
Your second view: Food details
We want to get up a page for each food object, that may in the future list more
details. In the views.py, append DetailView (comma separated) to the
django.views import statement at the top, and add another class at the bottom
of the file:
class FoodDetailView(DetailView):
    model = Food
Add another pattern to the urls.py of the app, and remember to import FoodDetailView at the top (the same way as you imported DetailView above):
url(r'^food/(?P<pk>\d+)$', FoodDetailView.as_view(), name='food-detail'),
The <pk> part of the pattern says that you want to match the primary key
field of the object. The primary key field is for all common cases the hidden
auto-incremented numerical id. When this url pattern is matched to an
incoming url, we have a match if the incoming url starts with the recipes/
of the app, defined in the project’s urls.py, then the next part has to be
food/ as defined here, and it has to end with a number. If we have a
match, Django will run the inherited as_view function of the
FoodDetailsView model, fetching the database record matching the incoming
integer to the Food table’s primary key.
You see that the last parameter is “name”. This is a short name to use when refering to links that may be long and have a lot of parameters. Another good thing about this is that we can change the urls without updating all the places where they are used. This concept is called named urls in Django, and this way, the url patterns are used both for url pattern matching and link url generation.
In the template we created some moments ago, insert the name of the url you need into the address field, so that the line becomes:
<li><a href="{% url food-detail object.id %}">{{ object }}</a></li>
Here we send in object.id (the hidden primary key of the object), so that when it is clicked, it will get used the other way, as described above.
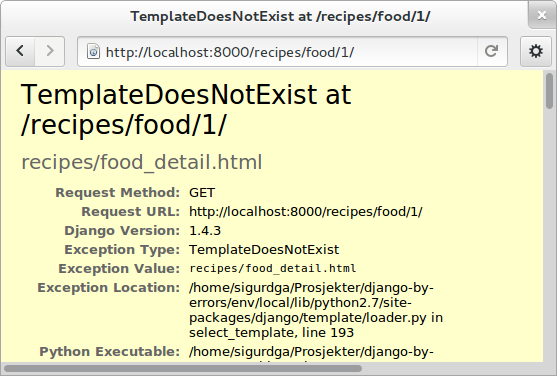
When you have a look at the web browser now, you see by hovering the mouse over the links that they point somewhere. By clicking one of them, you will see we need to make another template. templates/food_detail.html is missing.
In the innermost template folder, copy the template you already have to
food_detail.html in the same folder. Change the new template to add a new
title, h1 and the contents itself. In the title and h1, you can use {{
object }}. This will make use of the already utilized
__unicode__-function.
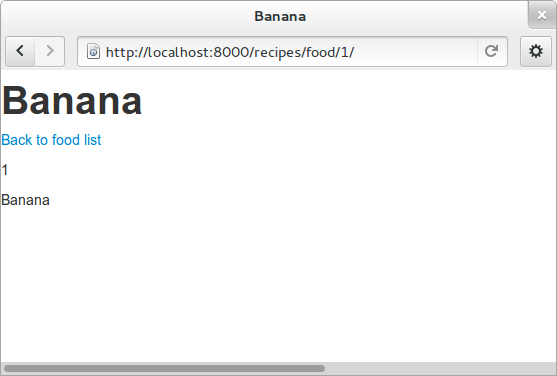
The contents is not too much fun as we do only have one field in the Food
model, and the normally hidden id. Add a few <p>-tags with the object id
and name, and a link back to the list, using the named url, like this:
<p><a href="{% url food-list %}">Back to food list</a></p>

<p>{{ object.id }}</p>
<p>{{ object.name }}</p>
You can be happy if the detailed page looks something like this when you refresh the browser:
Don’t repeat yourself: Use a common base
When you look at the two templates, you see that there is a lot of common code in them. Adding even more templates, the contents will become unorganized and at last not look consistent. Not good. Create a new template one folder level up, relative to the two you have, called “base.html” with the common code, like this:
<!DOCTYPE html>
<html>
<head>
<title>{% block title %}Generic title{% endblock %}</title>
<!-- Bootstrap -->
<link href="{{ STATIC_URL }}css/bootstrap.min.css" rel="stylesheet">
</head>
<body>
<div class="container">
{% block content %}
<h1>Generic title</h1>

Nothing interesting yet

{% endblock %}
</div>
<script src="http://code.jquery.com/jquery-latest.js"></script>
<script src="{{ STATIC_URL }}js/bootstrap.min.js"></script>
</body>
</html>
You see some placeholder text in there, inside some blocks {% block content
%}. Blocks are made to be overridden in the templates extending them, so we
will only see this placeholder text if we forget to override the blocks in the
other templates.
Now remove the common code from the other two templates and add a line at the top to tell them to extend the new base template. Then override the two blocks, title and content in both templates. The list template now looks like this:
{% extends "base.html" %}
{% block title %}Food list{% endblock %}
{% block content
%}
<h1>Food list</h1>
<ul>
{% for object in object_list %}
<li><a href="{% url food-detail object.id %}">{{ object }}</a></li>
{% endfor %}
</ul>
<a href="">Add food</a>
{% endblock %}
Now, the browser should look exactly the same for the two views. If you see the generic text of the base, then you do not override the blocks using the same names.
Create more objects
Append CreateView to the django.views import at the top of views.py, and
create a new view like:
class FoodCreateView(CreateView):
    model = Food
In the urls.py, add the new FoodCreateView to the import at the top, and add a new url pattern:
url(r'^food/create$', FoodCreateView.as_view(), name='food-create'),
It is good practice to have the more specific patterns above the patterns that tries to match url input. If the food details url was set up to take a word instead of a number as a parameter, it would also match “create” and would be trying to fetch a food object named “create”.
Now you can update the create link in the list template to use the new and
named food-create, like this:
<a href="{% url food-create %}">Add food</a>
Clicking the new link will also give an error about a missing template.
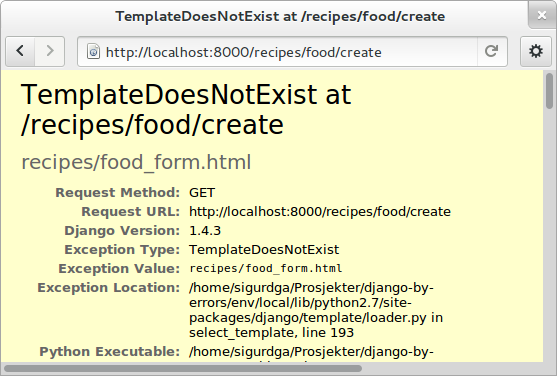
The error message tells us that “recipes/food_form.html” is missing. Create it and make it look similar to the other two templates, but with a form added to it:
{% extends "base.html" %}

{% block title %}Add food{% endblock %}

{% block content %}
<h1>Add food</h1>

<form>
    {{ form }}
    <button type="submit">Save</button>
</form>
{% endblock %}
We haven’t added any action or method parameters to the form at this time. The
{{ form }} tag will let Django show the fields that represent the models.
And we also have a standard submit button. Have a look at the form in the
browser.
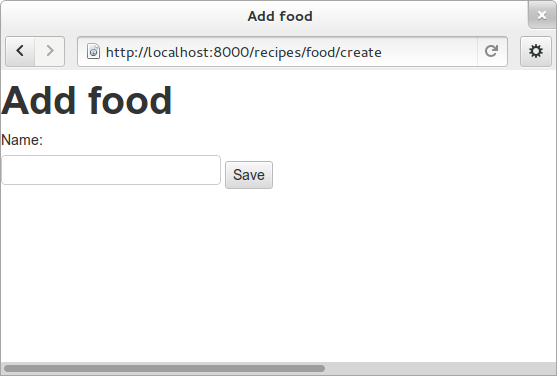
OK, but we can do better…
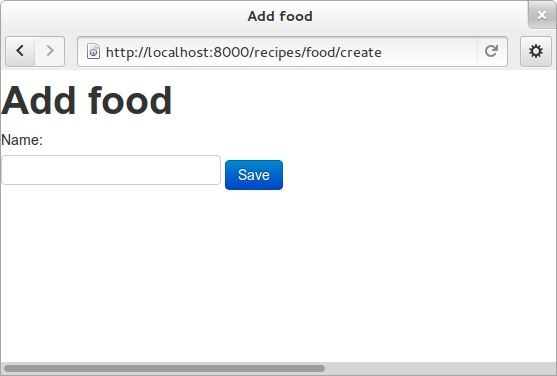
Primary action button
To make it slightly nicer, add a class="btn btn-primary" to the submit
button. Looks better? This is because of the styling we get from Twitter
Bootstrap.
A more crispy form
We will also make the form layout a bit nicer with the third party Crispy
Forms module. This will help us by adding useful CSS classes that will be
styled by the bootstrap css rules. To INSTALLED_APPS in setup.py, add
crispy_forms and install django-crispy-forms with pip:
pip install django-crispy-forms
Below the extends line in the food_form template, add:
{% load crispy_forms_tags %}
And add the crispy filter to the form variable, like this:
<form>
    {{ form|crispy }}
    <button class="btn btn-primary" type="submit">Save</button>
</form>

It now looks good, but it won’t work.
Making the form post
Now, add a fruit name and click “Save”. The url changes, but you are still on the same page. Our Django view will answer differently on GET and POST requests, but we did not tell the form to use the http POST method. Change the form definition to use the POST method:
<form method="POST">
If we try again, we will see another error, complaining about “Forbidden: CSRF
verification failed. Request aborted.”. Cross site request forgery is a well
established mechanism to used to decide that a request originates from the same
site. This is done by using the randomly generated SECRET variable in
settings.py to generate a combination of characters that will be attached as
hidden fields to all forms, and then be validated on the servers when the form
is posted. All you have to do is to add a {% csrf_token %} to your form.
Add this e.g. at the same line as the form definition tag, like this:
<form method="POST">{% csrf_token %}
Now, try to save again. Another error! So much errors, so much to learn!
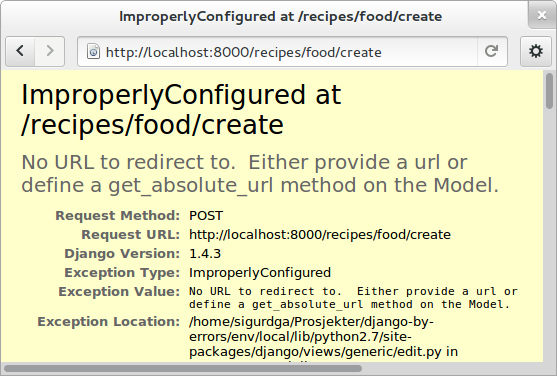
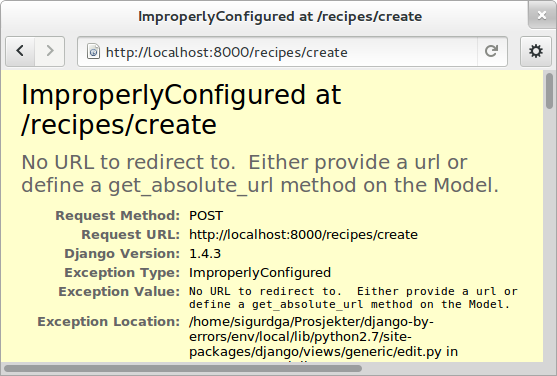
This time Django complains about not knowing where to send you after the form
has been parsed and your object saved. You would need to define either a
success_url in the view, to tell it where to go, or you can let Django go
back to the detailed view for the object. This is the default behaviour, as
long as you have a get_absolute_url method defined in your model. Head over
to models.py and add a method at the bottom of your Food class (on the same
indentation level as __unicode__):
@models.permalink
def get_absolute_url(self):
    return ('food-detail', [self.id])
The @models.permalink gives a short and easier way to write a url than when
calling reverse yourself.
Now, go back and add a fruit and click save. Nice? If you now have two fruits with the same name, that is because your fruit got added even though your success link were missing.
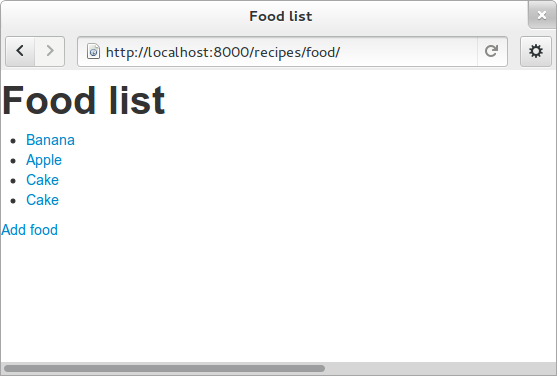
To be sure you will never register the same fruit twice, you can add
unique=True within the definition of name in your model class, so the
changed definition get something like:
name = models.CharField(max_length=20, unique=True)
If you now try to add a food object that has the same name as one previously created, you should see an error message like this:
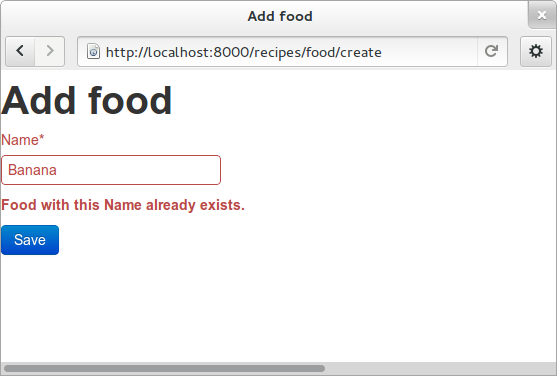
Now you know how to add a model and some views to list, see details or add new objects.
More models
To be able to create recipes, we need at least two more models. A recipe model is obvious, where we can add ingredients and a description of how to use the ingredients. But how do we connect the recipes to the food objects?
There is a way to connect two models together in a very generic way. This is called a “many to many relation”. In this case that would be too simple, as we need to add properties to the intermediate table. With ManyToMany we would be able to say what ingredients we need, but now how much of what ingredient we need in the recipe.
We need to say what Food object we will use, how much of it, and to what ingredient we want it added. When saying how much, we need to know the measurement, as “1 salt” is not very useful.
We will first define the Recipe model. It will have a title, a description of unknown length, and a __unicode__ method as we have already seen. But wouldn’t it be nice to have a nice looking url? From the news paper agencies (where Django was first created), we have gotten slugs: readable parts of a url that will be used to identify an object. We will add a slug field that will hold a nice slugified version of the object’s title:
class Recipe(models.Model):
    title = models.CharField(max_length=80)
    slug = models.SlugField(max_length=80)
    description = models.TextField()

    def __unicode__(self):
        return self.title
To connect the Recipe to the Food, we create a table to hold the references as well as the measurement fields:
class Ingredient(models.Model):
    recipe = models.ForeignKey(Recipe)
    food = models.ForeignKey(Food)
    amount = models.DecimalField(decimal_places=2, max_digits=4)
    measurement = models.SmallIntegerField(choices=MEASUREMENT_CHOICES)
We have ForeignKey fields that connects the Ingredient to a Food object
and a Recipe object. The amount is defined as a DecimalField and the
measurement as a SmallIntegerField. We could have created a table for all
the different measurements available, but we want to see how to make
predefined choices. The measurements will be saved as a number, but should be
treated as a choice of strings all the way through the application. In the
above model definition, we refer to MEASUREMENT_CHOICES which are not
defined. Define some choices above the Ingredient model definition where it
will be referred to:
MEASUREMENT_CHOICES = (
    (1, "piece"),
    (2, "liter"),
    (3, "cup"),
    (4, "tablespoon"),
    (5, "teaspoon"),
)
Migrations, simple
Now that we have defined new models, we should create and run a new migration as well. To create a new migration, go up to the project level directory where manage.py is and run:
python manage.py schemamigration --auto recipes
And run it with:
python manage.py syncdb --migrate
You may get into trouble here if you still have food objects with the same
name. Head over to http://localhost:8000/admin/recipes/food/ and delete the
duplicates. Then, try to run the syncdb command above again. If you now get an error about a table recipes_recipe already existing, you may need to run an SQL command manually to fix it, as stated by the top of the error message:
DROP TABLE "recipes_recipe"; DROP TABLE "recipes_ingredient";
This is because sqlite3 is not a very good database backend, but as it is easy to develop with, and you do not have very important data in our development database, it is really no problem. Where to run that SQL command:
python manage.py dbshell
Should give you access to the configured database shell. Exit by pressing ctrl-d. NOTE that you should only do that if you got this error.
Extending the admin inteface
Register the two new models with the admin interface, in recipes/admin.py.
(Do not forget to update the import statement):
admin.site.register(Recipe)
admin.site.register(Ingredient)
In the admin interface (at /admin), try to add a new recipe, e.g. Pancakes.
Insert “My Pancakes” as the title and “my-pancakes” as the slug. Try to
save without filling in the “description” field. Click Save. Form validations
will not let you save this without filling in a description. Or telling the
model that an empty description is OK, by adding blank=True to the
description field, like:
description = models.TextField(blank=True)
That worked. Before adding ingredient objects, go back and add some more food objects, like “egg”, “milk”, “salt” and “wheat flour”.
And then, add a new ingredient object. Choose “My Pancakes”, “Milk”, “0.5” and “liter” and save.
We get redirected back to the Ingredient list, and see that we need to add a __unicode__ method to the ingredient class. Python has several ways to format a string to look nice(REF). The first attempt is to add the method like this:
def __unicode__(self):
    return "%f %s %s (%s)" % (self.amount, self.measurement, self.food, self.recipe)
Here, we output a number which may contain decimals for the amount, a string for the measurement and a string in parentheses for the recipe it belongs to.
When refreshing the ingredient list page, you see that the %f gives a lot
of unneeded decimals. Change this to %.2g to allow at most two decimals.
You also see that the line does not print out the measurement, only the
numerical id. So change the self.measurement to
self.get_measurement_display() to use a method that is dynamically
available to fields with choices. (In the documentation this is called
get_FIELD_display()).
Now we have been sort of exploiting the string representation of the object to make it look nice in the admin interface. But instead of using the object’s string representation in a single cell in the table, you can define how to represent the object in the admin interface. Replace the Ingredient line in admin.py with this:
class IngredientAdmin(admin.ModelAdmin):
    list_display = ('food', 'amount', 'measurement', 'recipe')

admin.site.register(Ingredient, IngredientAdmin)
Here, you also see that the measurement is listed using multiple columns.
New views
Now, everything looks nice in the admin interface, but we still do not want to expose it to the users. We need to get similar functionality in our own views.
We want to list all recipes, so you should add a RecipeListView and a RecipeDetailView to views.py. Import the Recipe model in the first line, and add two new views:
class RecipeListView(ListView):
    model = Recipe

class RecipeDetailView(DetailView):
    model = Recipe
Create two new url patterns like this to the urls.py, and remember to do the correct import at the top:
url(r'^$', RecipeListView.as_view(), name='recipe-list'),
url(r'^(?P<slug>[-\w]+)$', RecipeDetailView.as_view(), name='recipe-detail'),
The first will match the address “/recipes/”. The second will match “/recipes/”
plus “a string containing numbers, letters, hyphens and underscores”. This is
used to match the slug field we described earlier. The P<slug> actually
saves the value to a parameter named “slug”, which is treated almost like an id
internally by Django.
Now copy the template food_list.html to recipe_list.html in the same folder, and modify the new recipe list to be useful to list recipes. Also get the list to link to the recipe-detail url that you just created:
{% url recipe-detail object.slug %}
While you are at it, copy food_detail.html to recipe_detail.html and modify that as well. The contents could be something like:
<h1>{{ object.title }}</h1>

<p><a href="{% url recipe-list %}">Back to recipe list</a></p>

<h2>Ingredients</h2>
<ul>
{% for ingredient in object.ingredient_set.all %}
<li>{{ ingredient}}</li>
{% endfor %}
</ul>

<h2>Description</h2>
<p>{{ object.description }}</p>
Here you see how we can list out the ingredients of the recipe.
You should now be able to navigate between the list and the detailed recipe(s).
In the recipe_detail.html you just created, change the last line to add
|default:"No description" to print out a default value when the description
has not been added. In case you wonder, this is how it should look:
<p>{{ object.description|default:"No description" }}</p>
Add recipes
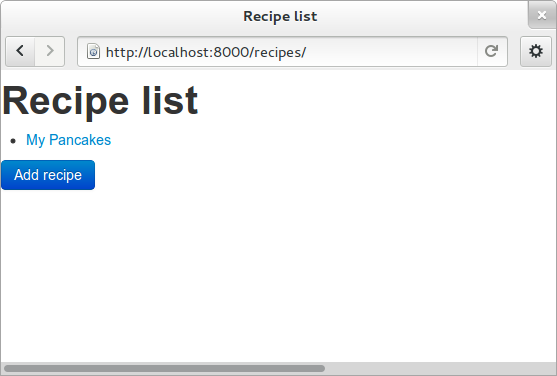
Now, we will add a new view by doing it the other way around. Add or update the linke at the bottom of the recipe_list.html. Like this:
<a href="{% url recipe-create %}" class="btn btn-primary">Add new</a>
Here, we point to a url pattern called recipe-create, and if you try to view the recipe list now, you will get an error message telling you this, you are using a link that is not defined.

So head over to urls.py and add recipe-create before the
recipe-detail url (if you put it after, the recipe-detail will be reached
first, and you will try to fetch a recipe called “create”):
url(r'^new/$', RecipeCreateView.as_view(), name='recipe-create'),
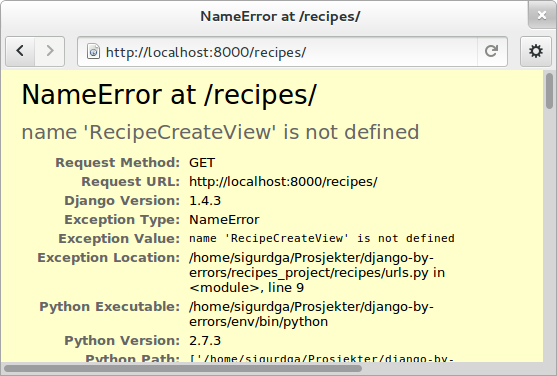
If you try to view the recipe-list in the browser now, you will see an error
message telling you that RecipeCreateView is not defined.
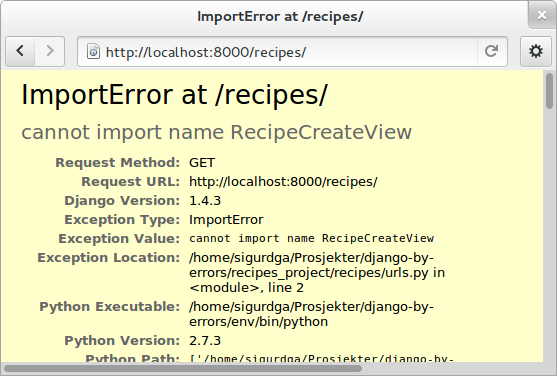
Add the missing import line, try again, and you will get an error message
telling you that it cannot find RecipeCreteView in views.py.
So, go ahead and create that simple function:
class RecipeCreateView(CreateView):
    model = Recipe
Try it in your browser. Yes, we now have a nice button.
If you try clicking that new button, you will once again see the error about a missing template. Even if this is a new template, the contents should look very familiar. You can copy food_form.html to recipe_form.html and do just a few modifications to get what you want:
{% extends "base.html" %}
{% load crispy_forms_tags %}

{% block title %}Add recipe{% endblock %}

{% block content %}

<h1>Add recipe</h1>

<form method="post">
    {% csrf_token %}
{{ form|crispy }}
<button type="submit" class="btn btn-primary">Save</button>
</form>

{% endblock %}
Now, you should see something useful in your browser. Try to create a simple
recipe, were you do not use too much time, as I now warn you that this will end
in an error. Yes, once again, Django complains about a missing success_url
- it does not know where to send us after the object is created.
You have already done this. Create a method in the Recipe model named
get_aboslute_url that will return the recipe-detail url:
@models.permalink
def get_absolute_url(self):
    return ('recipe-detail', [self.slug])
You see how we use include the slug when creating this url, as we need that to access the human readable url.
Try to add another recipe, and see that everything is now working.
Editing an object
The way to edit an object is not too different from creating a new object. It is in fact so similar that Django by default reuses the same template. As we will see, one of the differences is how we need to identify the object we are going to edit.
To the recipe-detail template, add a link to a still undefined url
recipe-update:
<p><a href="{% url recipe-update object.slug %}">Edit description</a></p>
The url will contain the slug, like the create view:
url(r'^(?P<slug>[-\w]+)/update$', RecipeUpdateView.as_view(), name='recipe-updat e'),
The view will not be very different from before, but you need to remember to
import UpdateView and code the view itself:
class RecipeUpdateView(UpdateView):
    model = Recipe
Now this should work without adding another template, as the recipe_form.html will be used by both the create view and the update view. When you try to edit the description, you will see that the template still says “Add recipe”.
Using a non-default template
You could have chosen other texts that would have fit both a create form and an
update form, but we want to show how to use a non-default template. Copy the
recipe_form.html to recipe_update_form.html, change its contents so it says
“Change recipe” and set the template_name variable of the view to point to
the new template instead of silently pointing to the default:
class RecipeUpdateView(UpdateView):
    model = Recipe
    template_name = "recipes/recipe_update_form.html"
Adding ingredients
The last thing to do is to combine all of this to add, show and delete ingredients. Start by adding a link to the recipe-list template where your users can click to add ingredients:
<p><a href="{% url ingredient-create object.slug %}">Add ingredient</a></p>
You see that we need to send in the slug of the object so that we do not need our users to choose this from a menu later. This slug is of course also part of the needed url pattern:
url(r'^(?P<slug>[-\w]+)/add_ingredient/$', IngredientCreateView.as_view(), name='ingredient-create'),
We first define the view as simple as possible:
class IngredientCreateView(CreateView):
    model = Ingredient
This will now work, except for the missing template, ingredient_form.html:
{% extends "base.html" %}
{% load crispy_forms_tags %}

{% block title %}Add ingredient{% endblock %}

{% block content %}

<h1>Add ingredient</h1>

<form method="post">
    {% csrf_token %}
    {{ form|crispy }}
    <button type="submit" class="btn btn-primary">Save</button>
</form>

{% endblock %}
When you look at the form in your browser, you see that you can make it a
little bit simpler to use by taking away the “Recipe” form field. First, add a
method to the IngredientCreateView that will select initial values in our
form:
def get_initial(self, *args, **kwargs):
    recipe = Recipe.objects.get(slug=self.kwargs['slug'])
    return {'recipe': recipe}
This will use the slug to fetch the corresponding Recipe object, and use
that to fill in the initial value of the recipe form field. Try it out and
see that it works.
The next step is to hide the field from the user, as they should no longer need
to do anything to it. To hide the field, you need to define your own form. We
do this by creating a new file in the same folder as views.py called
forms.py. In this file, we define a new ModelForm (REF), a form that will
be based on the Ingredient model, and we override the form widget used to
show the recipe field:
from django.forms import ModelForm, HiddenInput
from recipes.models import Ingredient

class IngredientForm(ModelForm):

    class Meta:
        model = Ingredient
        widgets = {'recipe': HiddenInput()}
Now, have a look. Isn’t it easier? Try to add some ingredients. Oh noes!
Another error! This time, we will actually define a success url, as we do not
want to show any details about “1 tablespoon of salt”. We want to redirect back
to the recipe details instead. To the same view, add a method called
get_success_url that contains:
def get_success_url(self):
    return reverse('recipe-detail', args=[self.kwargs['slug']])
Deleting objects
You have probably done your fair share of testing now, and have accumulated a large amount of testdata. Some ingredients have been created that does not belong to some recipes, so we need to delete them.
First, add a link to each ingredient row in the recipe detail template. It could say “delete” or be a little “x”, but it should point to the url you name “ingredient-delete”, and it should take in the object’s slug and the ingredient’s id:
<li>{{ ingredient }} <a href="{% url ingredient-delete object.slug ingredient.id %}">x</a></li>
Now, create the url pattern this points to:
url(r'^(?P<slug>[-\w]+)/remove_ingredient/(?P<pk>\d+)/$', IngredientDeleteView.as_view(), name='ingredient-delete'),
This is probably the longest of them all as we use both the slug and the ingredient’s id field. You maybe wonder if we really need to pick up the slug again, since the ingredient’s id should be unique alone, but it is a nice looking url, and it will save us from some work later.
So, happily knowing what is going on, you bring up your browser and try to delete one of the silly test ingredients, but what? An error? Missing an ingredient_confirm_delete.html was maybe a bit unexpected.
Delete confirmation
The default delete view is doing the same thing as the create and update views by showing a form on a GET request and processing the form on the form on a POST request.
There are several ways to circumvent the confirm_MODEL_delete.html templates, by using a button in a small form, using javascript to send a POST request instead of a get on the link clicking, redirecting from the GET to the POST… but I think a delete confirmation page is a good habit, especially when listing out related objects that would also be deleted. The ingredient_confirm_delete could look something like:
{% extends "base.html" %}

{% block title %}Delete ingredient{% endblock %}

{% block content %}
<h1>Delete ingredient</h1>

<h2>Really delete {{ object }} from {{ object.recipe }}?</h2>

<p>It will be permanently lost</p>

<form method="post">{% csrf_token %}
    <button type="submit">Delete</button>
</form>

{% endblock %}
# FIXME: se om det er noe vits med form-output
The important thing is the delete button. Skipping the csrf_token will give
back the error about cross site scripting attacks again.
You should really add a cancel button to the form as well to help the users, bringing them back to the detail page without changing anything:
<a href="{% url recipe-detail object.recipe.slug %}">Cancel</a>
Now this is now a small form with a button and a small link. If you add some
css classes defined in the Twitter Bootstrap css, it can be a lot nicer. Add
class="btn" to the cancel link to style it like a button, and class="btn
btn-primary" to the delete button to make it look like a default action
button.
Yes, this is nice an shiny, but the form is still not working. If you try it,
you’ll see that we are missing a success-url. This time, we will just copy the
get_success_url we made in IngredientCreateView to
IngredientDeleteView to get the same redirect back to the
recipe-detail:
def get_success_url(self):
    return reverse('recipe-detail', args=[self.kwargs['slug']])
Now, this looks better, and redirects us to the recipe we deleted the
ingredient from. Just to show off, we could replace the delete link on the
recipe detail view with an icon from Twitter Bootstrap, by adding an
<i>-tag with a class representing the icon we want to use (“icon-remove”)
from http://twitter.github.com/bootstrap/base-css.html#icons:
<li>{{ ingredient}} <a href="{% url ingredient-delete object.slug ingredient.id %}"><i class="icon-remove"></i></a></li>
Easier editing with Markdown
Try to edit the description of a recipe and save it. The description of a recipe will probably consist of several steps on a way to the finished meal, and you would probably want to put these steps in several paragraphs or a list. As you probably guess, you would need to type html to get this nice looking.
There is a filter called “markdown” filter that will take a more simpler made
text and convert it to html for you (REF). To the description field in the
recipe-detail template, add |markdown between description and
|default, like this:
<p>{{ object.description|markdown|default:"No description" }}</p>
You shouldn’t be surprised that this will not work. The error message should tell you that Django does not understand “markdown”. You need to load a module where “markdown” is defined. On line two of the file, load the markup filters:
{% load markup %}
This still does not work, because you also need to have a markdown library installed which this filter will contact to parse the text. Head over to a terminal where your virtualenv is activated, and install markdown using Python package installer, Pip:
pip install markdown
You will also need to tell Django to actually load this file in settings.py. In the INSTALLED_APPS section, add:
'django.contrib.markup',
You do not have an easy way to go between the recipe section and the food section of your website. What about using a fancy top menu from Twitter Bootstrap http://twitter.github.com/bootstrap/components.html#navbar? In “base.html” template (one level up from the other templates), add a this inside the “container” div, before the “content” block:
<div class="navbar">
    <div class="navbar-inner">
        <a class="brand" href="{% url recipe-list %}">Djecipes</a>
        <ul class="nav">
            <li><a href="{% url recipe-list %}">Recipes</a></li>
            <li><a href="{% url food-list %}">Food</a></li>
        </ul>
    </div>
</div>
Future sections?
- debugging with ipython, pdb, web error
- unit testing
- authentication